
Application Insights lets you monitor your deployed live applications. It supports web services, web apps, and device apps across a variety of languages and device ecosystems. Application Insights allows for collection of data around availability, performance, usage, and diagnostics.
Application Insights collects rich operational, performance, and customer usage information from server and client/device applications – whether they run in on-premises or Microsoft Azure or a third-party cloud provider or a combination of all three. With this 360-degree view into the availability, performance, and usage of your applications and services, you can quickly detect availability, performance problems and pinpoint their root cause in your live application.
Required Analysis can be performed in Microsoft Azure.
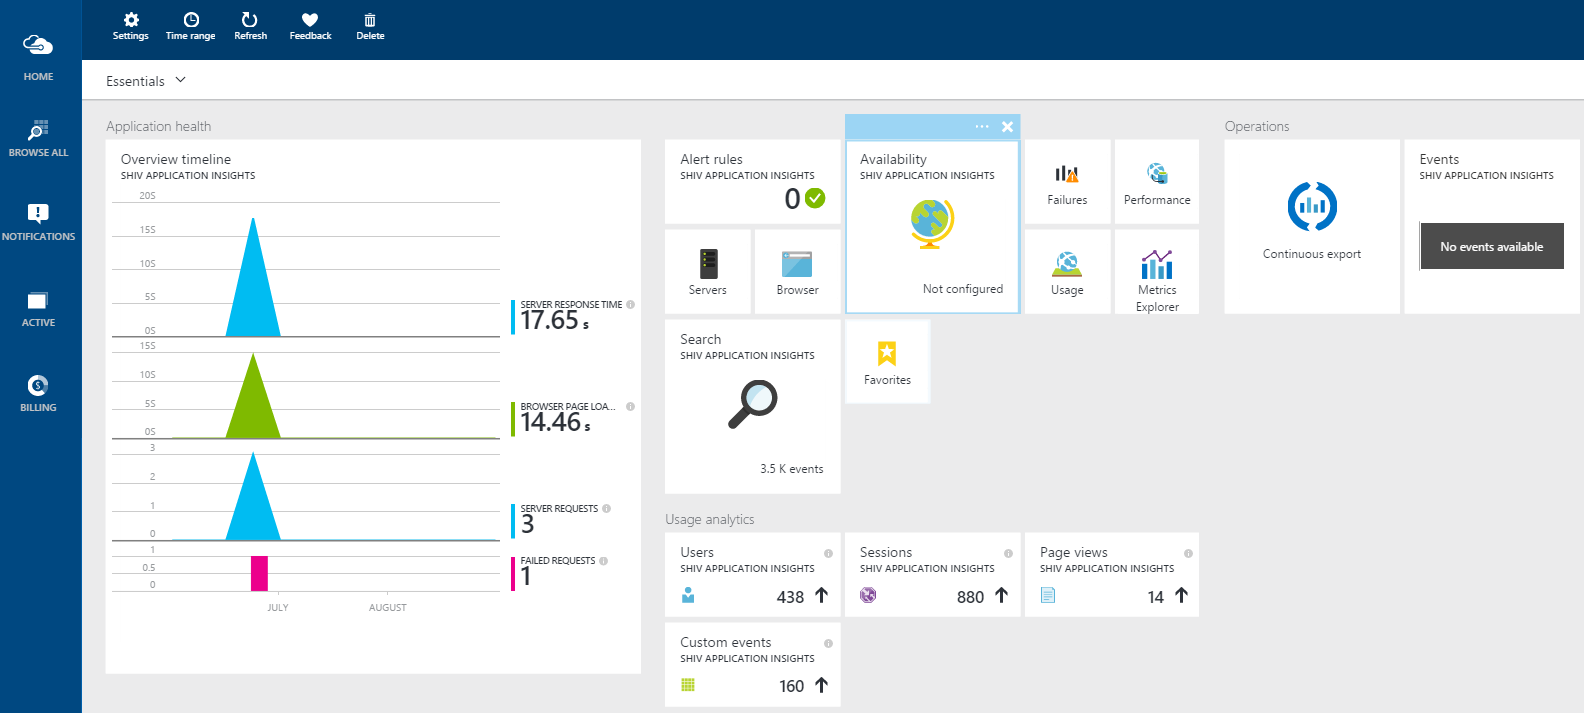
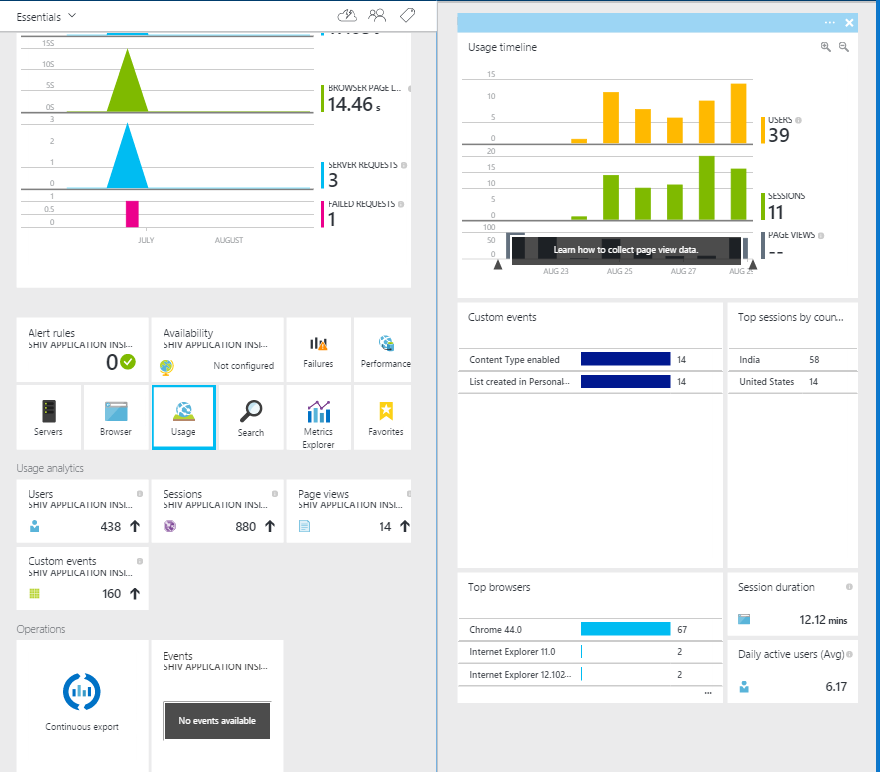
This is what you get with Application Insights
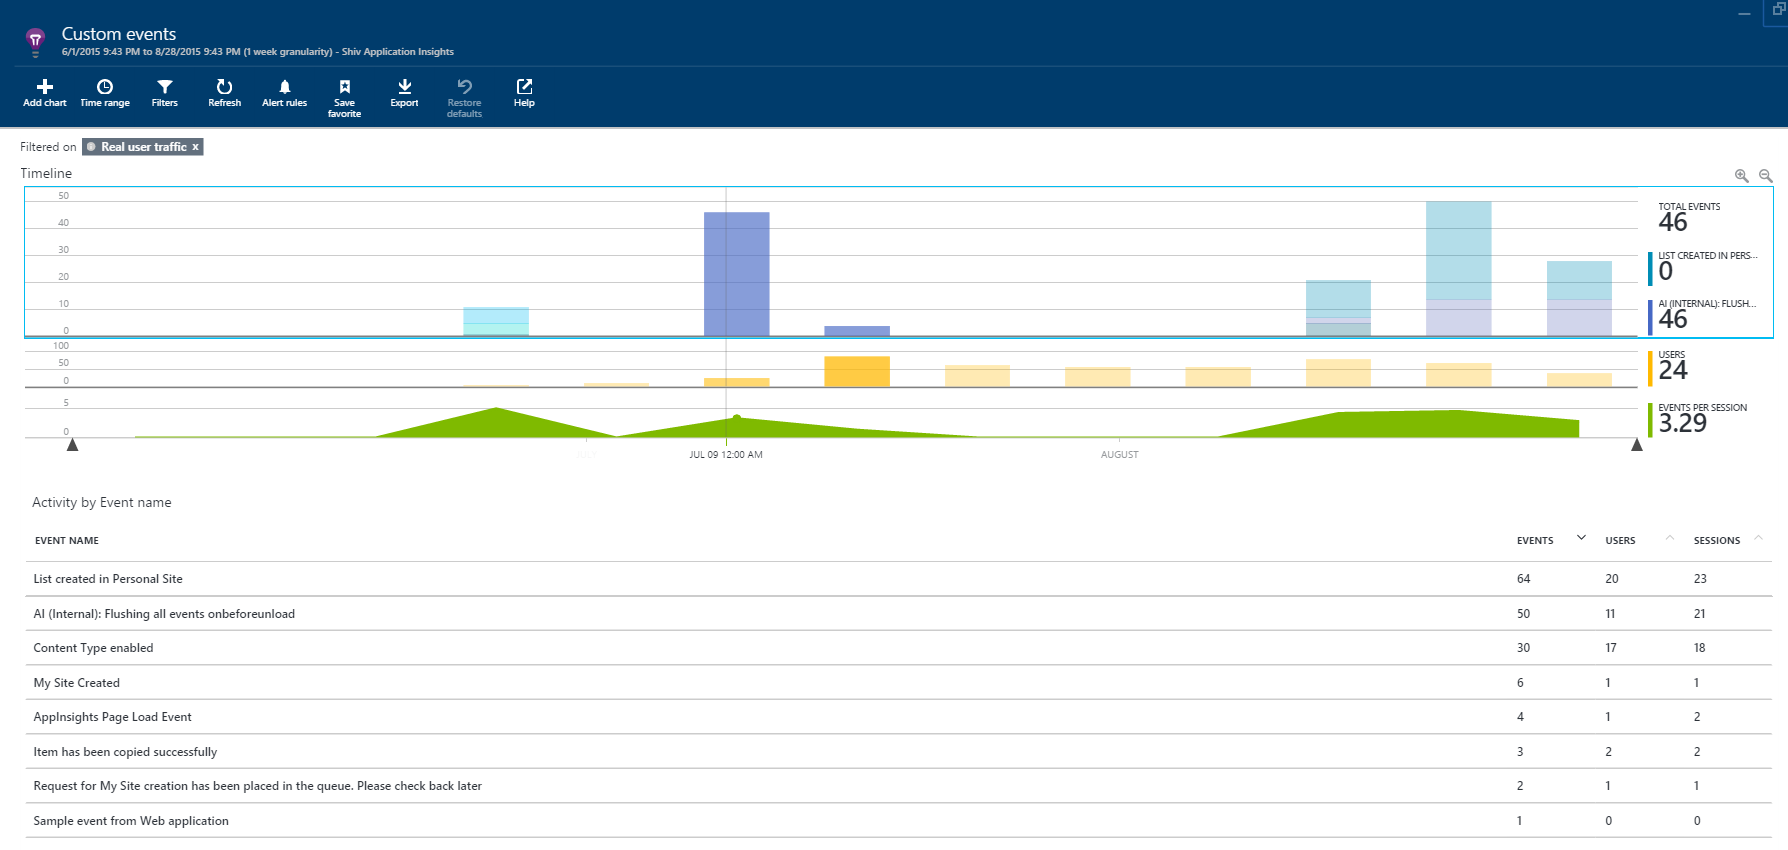
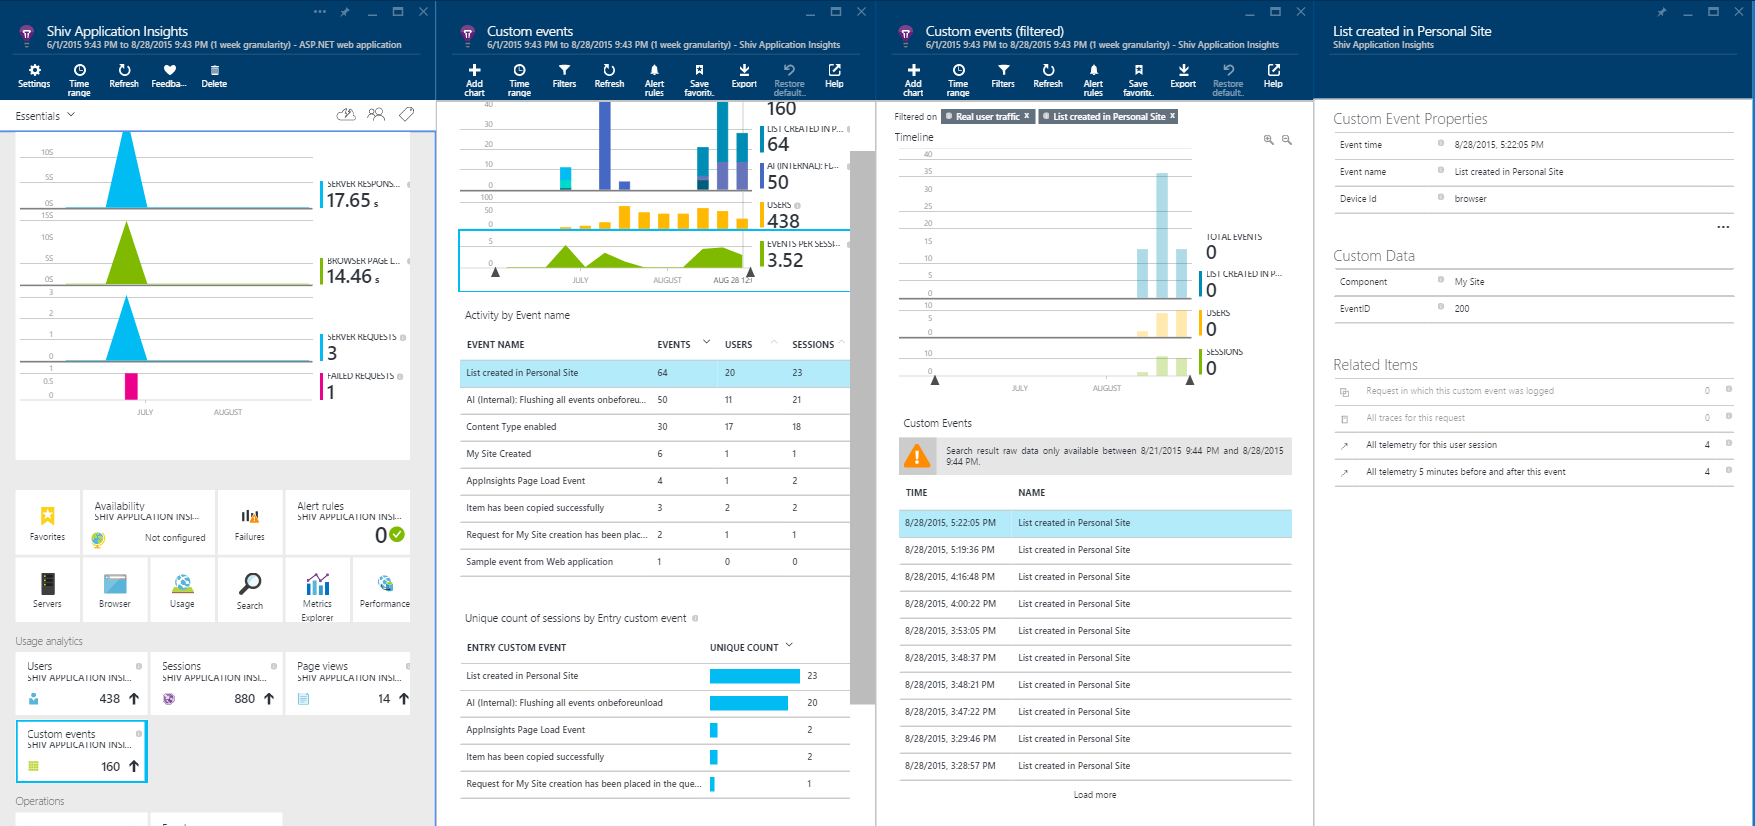
Custom Events
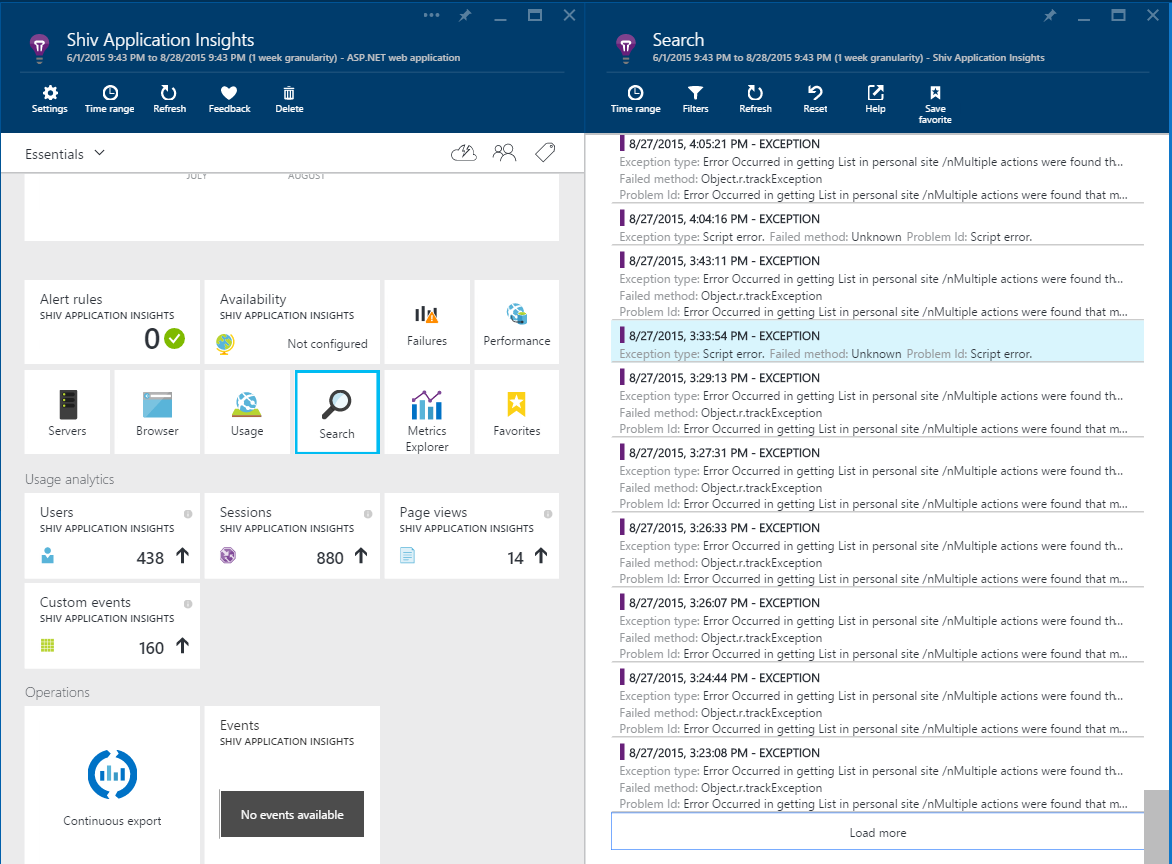
Search for an Event/ Exception
Usage Analysis
Get Started:
Steps to create Application Insights
1. Login to the Microsoft Azure Preview portal (https://portal.azure.com/) and click on “New” and select “Application Insights” 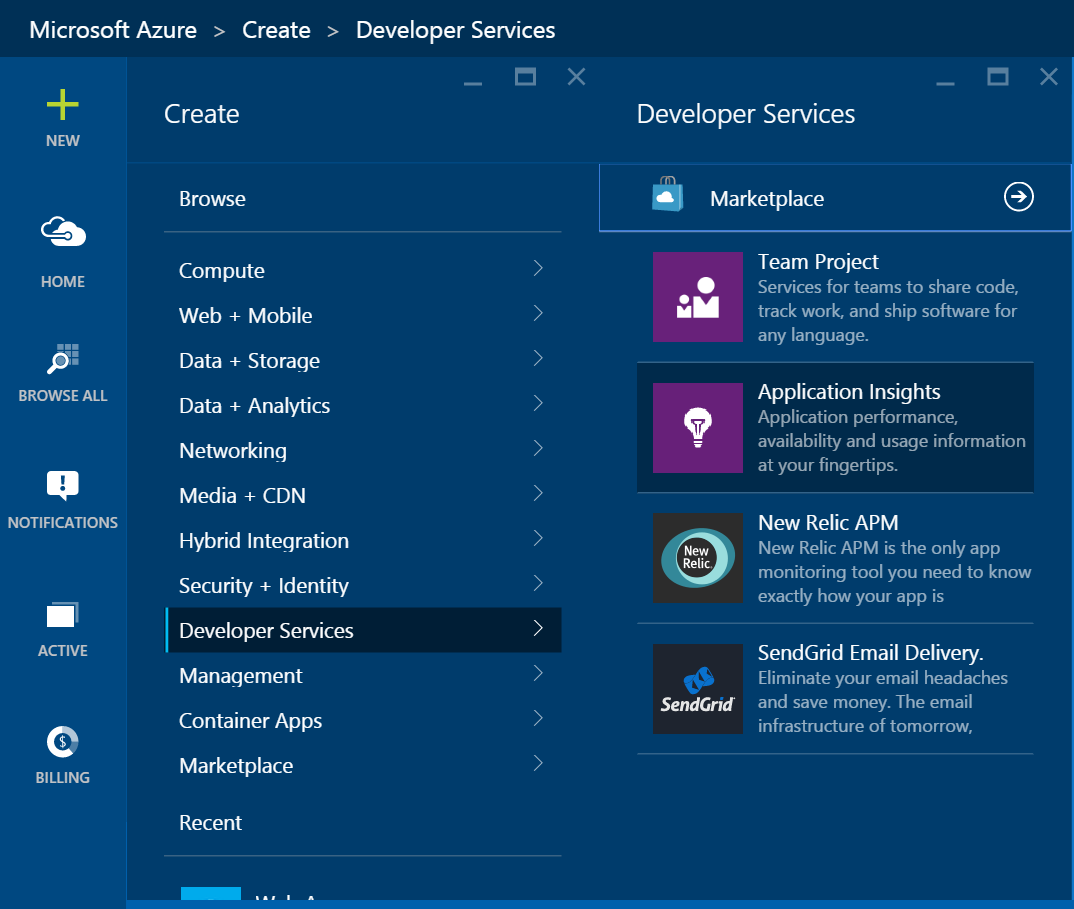
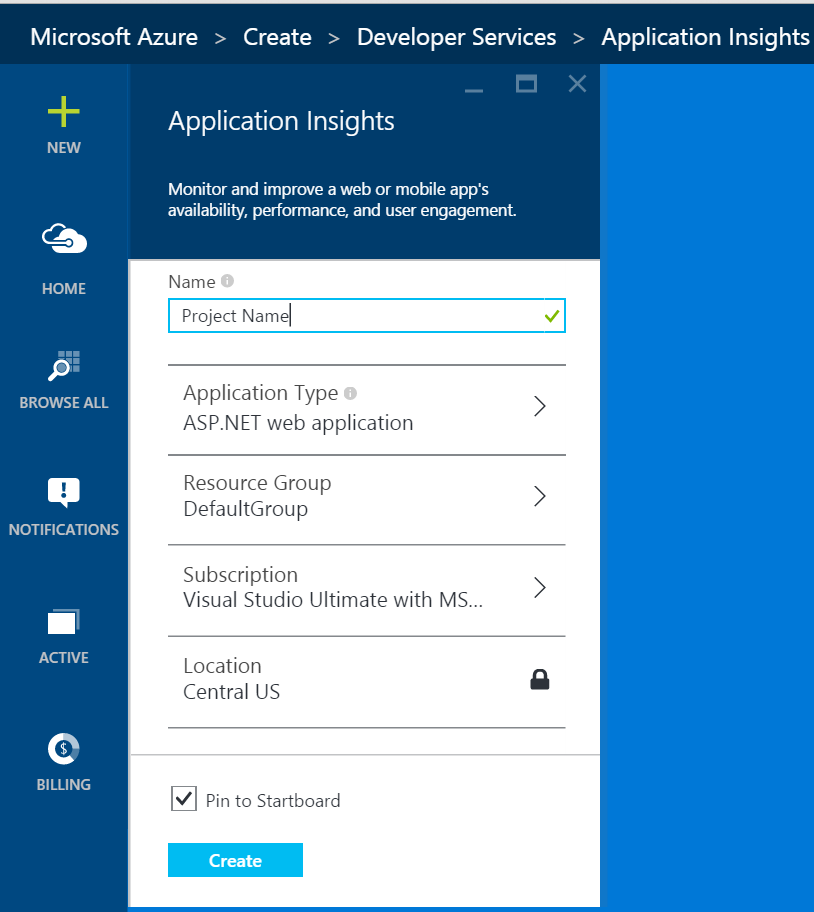
2. Give a name for the Application Insight, create or use the existing group for “RESOURCE GROUP” and select the “APPLICATION TYPE”, “SUBSCRIPTION”, “LOCATION” then click on “Create”.
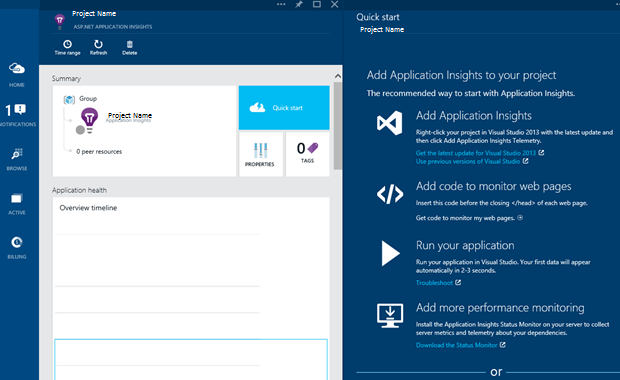
3. Please wait for few minutes to get the application created. Once the application is created it’ll pop-up the application with the features as following screenshot:
Adding Application Insights to a blank Web Application Project
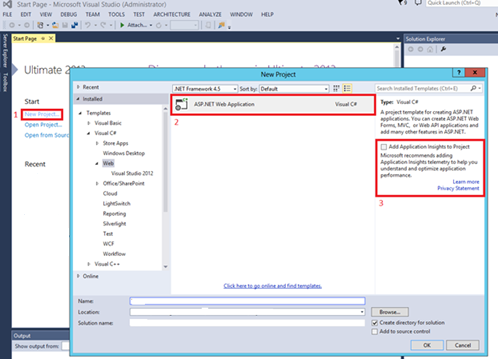
1. Open the visual studio 2013 (Update 3 or later versions) or 2015 or later. Click on “New Project” on the startup page. Select the project and make sure that “Add Application Insights to project” is selected which will appear on the right panel (3). And once it is selected it’ll asks for login.
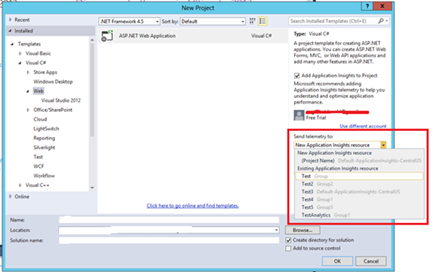
2. If Sign-In is done, then select the group which is specified for the Application Insights in Azure portal or select “New Application Insights resource” and click on “OK”.
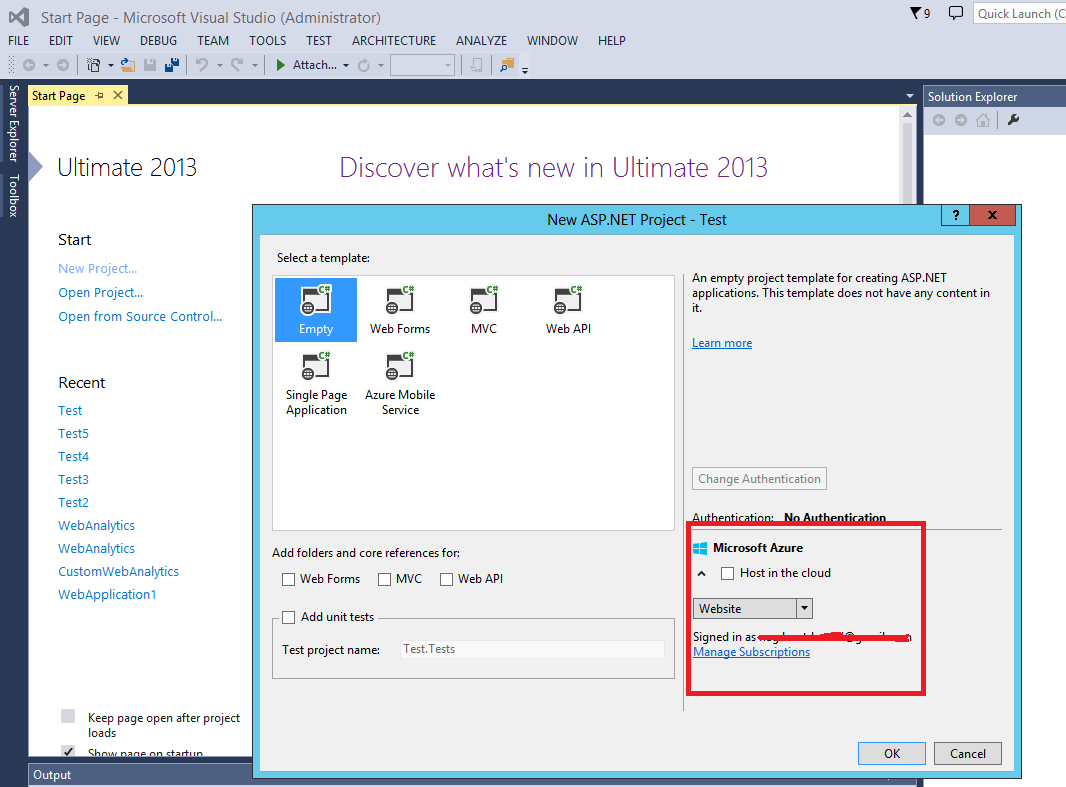
3. Select a template and if you want to host a site in azure the select “Host in the cloud” or un-check it and click on “Ok”. While creating the project NuGet packages will also be installed and it’ll provision ApplicationInsights.config file.
Once you have done this you are ready to make use of all the goodness that Application Insights offers.
You can log Events, Traces and Exception from your JavaScript & .NET application and perform the analysis in Azure portal. I will walk you through with the process in my next blog post.
Till then stay safe and happy.
Thank you for your time. Have a good rest of your day!